Wednesday, June 17, 2015

[Unity 3D] Tutorial 3: Survival Shooter

This is a top down isometric style game in which you basically need to shoot everything that moves to survive (a.k.a. survival shooter). You impersonate a boy who's dreaming that all of his toys have come to life. This is the last beginner level tutorial and covers the following topics:

  • Use layers to isolate game objects
  • Animations: use and control transitions in model animations, animate GUI objects
  • Ray casting
  • Input.GetAxis vs Input.GetAxisRaw
  • Movement normalization
  • Time.deltaTime
  • Use Lerp to smoothen transitions
  • AI: use NavMesh, bake a navigable area
  • More on GUI components (CanvasGroup, Slider, Image, etc.)
  • Awake method
  • LineRenderer
  • Alternative method for timers: InvokeRepeating

These are the main modifications I made to make it work in Unity 5:

  • Disable the flag "Has Exit Time" so the animations are in sync with the events. This cancels the ongoing animation when there is a transition to another state
    • Open the Animator Controller
    • In the Animator window, select the transition to modify
    • In the Inspector, locate and uncheck the flag
  • Change the LineRenderMaterial to use an Unlit/Color Shader. The LineRenderer renders the lines black under certain shaders.

The export to WebGL in this project is not so good. The scene appears very dark and the textures have some kind of black spots, but it should look like on the image below. I believe this is because of the preview version of the WebGL player, or maybe due to incompatibility of the assets with Unity 5. Anyway the game is playable, so give it a try and let's see how much you can last!


Thursday, June 11, 2015

[Unity 3D] Tutorial 2: Space Shooter

In this second tutorial they teach you to make a very basic top down space shooter. There is a little more scripting than in the first one and involves using more game objects and features. You learn to:
  • Change the resolution of the game
  • Modify and save a layout
  • Import assets from the Unity Asset Store
  • Work with mesh models, textures and materials
  • Use mesh colliders and capsule colliders
  • Instantiate and destroy prefabs
  • Add background music and sound effects 
  • Use tags to identify game objects
  • Work with coroutines
  • Use the yield instruction
  • End a game and reload it
  • Use methods and parameters like Mathf.repeat,Time.time or angularVelocity
  • Differentiate between screen space and viewport space
The tutorial is again very easy to follow, but it has been developed in Unity 4. If you are using Unity 5 then you will need to make a few modifications to make it work:
  • Mesh colliders won't work unless you enable the Convex flag
  • Some static references such as rigidbody have been removed:
    • Unity 4: 
      • rigidbody.AddForce(movement);
    • Unity 5: 
      • RigidBody rigidbody = GetComponent<Rigidbody>();
      • rigidbody.AddForce(movement);
  • The render settings menu has been moved:
    • Unity 4:
      • Edit > Render settings
    • Unity 5:
      • Windows > Lighting
  • The GUIText is no longer accessible from the Create menu. In Unity 5 you need to create an empty game object and then go to Add component > Rendering > GUIText
And that's all I can remember at the moment. I encountered some of these issues already in the first tutorial but I forgot to mention them in the post.

Finally I added a couple of extras to try new things and make it a bit more interesting: a scrolling background and a blinking text. I will explain how to do it at the end of the post in case someone is interested. I could have added more things like parallax or smarter enemies, but I just want to move on to the next tutorial :-)

And here's the result:


Input settings:
- Move with the arrows
- Shoot with the space bar or the left mouse button


How to make a 2D scrolling background

For the background I followed this live trainning session, which shows several ways to do it. I tried the first two and in the end I kept the version that uses the texture offset to create the effect.You just need to create a Quad, assign it the desired texture and add the following script to it:

public class OffsetBackground : MonoBehaviour 
{

public float scrollSpeed;
private Vector2 originalOffset;

void Start ()
{
originalOffset = GetComponent<Renderer> ().sharedMaterial.GetTextureOffset ("_MainTex");
}

void Update () 
{
float offsetY = Mathf.Repeat (Time.time * scrollSpeed, 1);
Vector2 offset = new Vector2 (0, offsetY);
GetComponent<Renderer> ().sharedMaterial.SetTextureOffset ("_MainTex", offset);
}

void OnDisable ()
{
GetComponent<Renderer> ().sharedMaterial.SetTextureOffset ("_MainTex", originalOffset);
}
}


How to make a blinking text

Making a text blink is very simple. You just need to set the text of the GUI element to blank for a few seconds and then back to its original text for a few more seconds, alternatively. In my case I used it for the "Press 'R' to restart" label.

First I created this coroutine:

IEnumerator BlinkRestartText()
{
while(restart)
{
restartText.text = "Press 'R' to restart";
yield return new WaitForSeconds(blinkingRate);

restartText.text = "";
yield return new WaitForSeconds(blinkingRate);
}
}

And then modified the SpawnWaves method as follows:

if(gameOver) 
{
restart = true;
restartText.text = "Press 'R' to restart";
StartCoroutine(BlinkRestartText());
break;
}

That's all. When the game is over the coroutine is launched and runs until the restart flag is set to false. This happens when the player presses R and the game is reloaded (the method Start will be called by Unity). As for the content of the loop, it will first of all set the text in the GUIText object and wait for a few seconds, and then set it to blank and wait for a few more seconds, and so on. The use of the yield instruction ensures that the game won't be paused while waiting, and that the function will continue from the line after the yield after the wait is over.


Tuesday, June 9, 2015

[Unity 3D] Tutorial 1: Roll a ball

Last week I finished the first Unity tutorial. They have a bunch of them on their website for both beginner and intermediate users, and they are really well explained. You can choose between two learning paths: a set of projects with increased difficulty, and a set of lessons sorted by topic. Personally I think it's best to start with the projects and check the topics as you need them.

In the first tutorial you get to learn the very basics of Unity:

  • Create a scene
  • Add game objects to a scene and enable/disable them as needed
  • Use scripts to define behaviors
  • Convert a game object into a prefab that you can reuse
  • Read keyboard inputs
  • Create a camera that follows the player
  • Basics of physics and collision management, and some hints for its optimization (Rigidbody, static and dynamic colliders)
  • How to display text
  • How to export a game

Here's my version exported as WebGL:


Wednesday, June 3, 2015

Focusing

After doing some research I have come to the conclusion that I want to be a serious games developer. That is, games whose primary goal is not to entertain, but to serve as a training or a teaching tool, to help marketing, etc. This doesn't mean though that these kind of games cannot be entertaining. In fact I believe that they should be, so they can better achieve their goal (specially if their aim is to be educational).

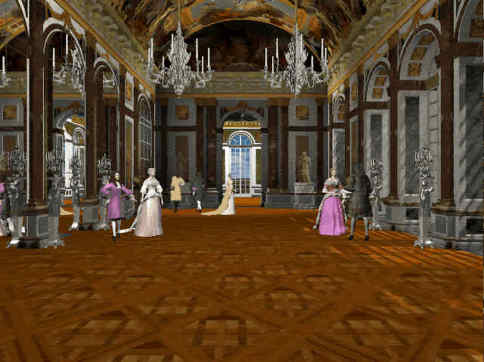
This being said, my focus of interest is still archaeology and history. The kind of games that I would like to make would use historically rigorous models, real stories and characters, and would be educational. I recall a game that I played during childhood and illustrates quite well what I have in mind. It's called "Versailles 1685" and I remember finding it very interesting at the time. What I liked about it is that it takes place in Versailles palace and you get to walk around its different rooms and areas, view and read about its paintings, meet many historical characters and learn about them and about life in the palace. Here some images of the game:


So now it's easier to know what I need to learn. I searched for job offers in serious games and game development in general, and the key skills that I will need are C++ and Unity 3D. Besides this, most of the offers require professional experience in game development, with at least one published game, and about half of them require to have a master in game development. Therefore I've been considering signing up for one of the two main masters in video game development that exist in Barcelona:
From the one taught by UPC I like that it's cheaper and as a UPC Alumni Premium member I get an additional discount :-D Also they use game engines, which would be useful to learn (I guess), and the master has for some reason more visibility among companies. The annual event in which students present their works is always full of people.

The one by UPF is more hardcore. They don't use any game engines and instead expect you to implement your own. I see it as a great learning experience. Another good thing about it is that they split the contents into two independent specializations: design and programming. That means that programmers can focus on just programming and skip the modelling and animation part. Finally, the amount of classroom hours is higher.

I was almost convinced by the one at UPF but a conversation with my boyfriend and several other friends who are professional game programmers walked me out of it. In their opinion masters are too expensive for the benefit they provide, and game companies don't care much about the education section after all. Companies value experience and motivation. Since I'm already a developer they believe that I can learn the same or more on my own. So their piece of advice is that I keep my money and start making copies of simple games or join an indie group. I just need to have a few small projects in my portfolio, know the main concepts in game development and be well versed in the language. And if they all agree on that then I guess they're right.

Next stop: becoming an indie game developer.